#amigurumi #freepattern #freepatternamigurumi #crochettoppattern #crochet #crochetpattern
What does amigurumi means?
The word Amigurumi comes from Japanese. The Japanese call handicrafts knitted with crochet and needle as Ami. The Japanese call the toys that are filled with objects such as fibers or cotton as Nuigurumi. The word Amigurumi is derived as a combination of these two words.
Amigurumi knitting techniques are very easy. You can find many handcrafts prepared with these techniques on my site. What is Amigurumi for beginners in Amigurumi handwork? How to knit amigurumi? In this blog, where you can find the answers to the questions with pictures, you will be able to learn about Amigurumi in all details.
I share in this blog are amigurumi cats, amigurumi dogs, amigurumi fish, amigurumi unicorn, amigurumi penguins, amigurumi parrot, amigurumi giraffe, amigurumi pigs, amigurumi bunnies, amigurumi cows, amigurumi sheeps, amigurumi bees, amigurumi dolls, amigurumi snakes, amigurumi mice, amigurumi elephants, amigurumi pumpkins, amigurumi pandas, amigurumi owls, amigurumi cartoon characters, amigurumi twetters, amigurumi caterpillars and more …
Also I’m sharing new amigurumi free patterns every day.
Todays daily new amigurumi free crochet pattern is Bear.
I want to give you some informations about this pattern;
Designer: @vivir_vintage
Materials
• 3.75 gauge honey acrylic yarn
•4.0 gauge chocolate acrylic yarn
•Natural silky acrylic with cotton yarn
• 3-ply brown cotton yarn
• 6-ply white cotton yarn
• Fiberfill stuffing
• Eyes of 10mm safety
• 15mm button
• Scissors
• 4.0mm crochet hook
• Stitchmarker
abbreviations
AM – magic ring
Pb –
single crochet Inc – increase in
single crochet Dec – Decrease
Ch – chain
Pc – slip stitch, slip stitch
V – round(s)
Arm (x2)
Natural silky acrylic with cotton thread.
V1 . 8 sc in AM (8)
V 2-10 . sc in the 8 stitches (8)
Bind off and leave thread to sew.
Stuff with fiber filling.
Ear (x2)
Honey acrylic thread caliber 3.75
V 1 . 6 sc in AM (6)
V 2 . inc, repeat 6 times (12)
R 3-5 . sc in the 12 stitches (12)
Bind off and leave thread to sew.
Scarf
4.0 gauge chocolate acrylic
yarn Crochet scarf in rows not in rounds.
V1 . Chain 4 (4)
V 2-46 . Opposite the chain 3 laps from the crochet hook crochet 3sc, chain 1, lap (3)
On the next row you will crochet the
V 47 buttonhole . Chain 3, 3sc Fasten off
and hide all the threads.
At the end you will sew the button.
Snout
Cotton with silky acrylic butter
V 1 . 6 sc in AM (6)
V 2 . inc, repeat 6 times (12)
Bind off and leave thread for sewing.
Head
Honey acrylic thread caliber 3.75
V 1 . 6 sc in AM (6)
V 2 . inc, repeat 6 times (12)
R 3 . sc, inc, repeat 6 times (18)
R 4 . 2sc, inc, repeat 6 times (24) R
5 . 3sc, inc, repeat 6 times (30) R
6 . 4sc, inc, repeat 6 times (36) R
7 . 5sc, inc, repeat 6 times (42)
R 8-17 . sc in the 42 stitches (42)
R 18 . 5sc, dec repeat 6 times (36)
R 19 . 4sc, dec repeat 6 times (30)
Place safety eyes between rounds 13 and 14 leaving 8 stitches apart. Sew the snout in the center of the eyes, leaving 2 stitches between the eyes. Continue weaving the head
V 20 . 3sc, dec repeat 6 times (24) R
21 . 2sc, dec repeat 6 times (18)
Stuff the head with some fiberfill.
On round 22 start knitting the body.
Body
Honey acrylic thread gauge 3.75
V 22 . sc in the 18 stitches (18)
R 23 . 2sc, 1 inc repeat 6 times (24)
R24-30 . sc in the 24 stitches (24)
Change color to natural silky acrylic with cotton thread. Fill the body with fiberfill
Now divide the 24 stitches for the body in half to make the legs Count back 12 stitches from the last stitches of round 30 and place the stitch marker. These 12 points will correspond to Leg 1
The remaining 12 correspond to Leg 2
leg 1
Natural silky acrylic with cotton thread.
Row 31-35 . sc in all 12 stitches (12)
Stuff leg with fiberfill
Row 36 . dec, repeat 6 times (6)
Bind off the last 6 stitches and hide the yarn. Repeat this pattern with the remaining 12 stitches to knit Leg 2.

Mounting
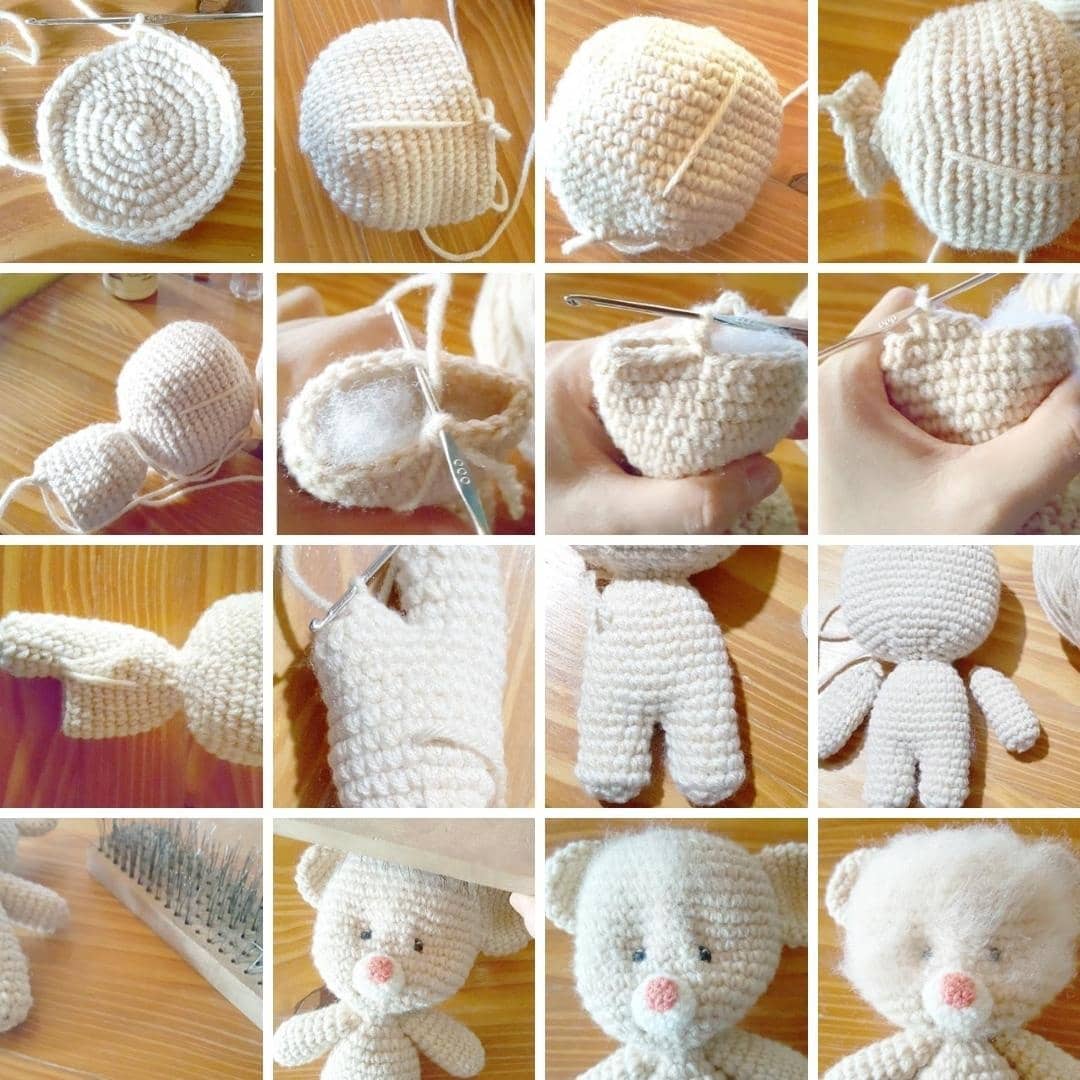
• Before sewing I recommend you make your amigurumi furry. To do it you need a brush. with metal bristles. You can find them at hardware or pet stores.
• Brush only the acrylic yarn part of the bear with the wire bristle brush. As you will brush the fur will appear. The more abrupt. The more volume of fur the bear will have. Remember to always do it delicately. (You can visit the Youtube page of the creator of the Amigurumi pattern to see how it is done.)***
• Sew the arms on each side of the body just below the head.
• Sew the snout between the eyes.
• Sew the ears between rows 6 and 11 of the head.
• Sew the button on the opposite end of the scarf. Then wrap it 2 times through the bear’s neck and thread the button through the buttonhole.
• With embroidered nose in 3-ply brown cotton thread.
• With 6-strand white cotton thread we embroider the light of the eyes.
• Optional: blush on the cheeks
Congratulations, you have completed the amigurumi bear pattern. 🙂


