#amigurumi #freepattern #freepatternamigurumi #crochettoppattern #crochet #crochetpattern
What does amigurumi means?
The word Amigurumi comes from Japanese. The Japanese call handicrafts knitted with crochet and needle as Ami. The Japanese call the toys that are filled with objects such as fibers or cotton as Nuigurumi. The word Amigurumi is derived as a combination of these two words.
Amigurumi knitting techniques are very easy. You can find many handcrafts prepared with these techniques on my site. What is Amigurumi for beginners in Amigurumi handwork? How to knit amigurumi? In this blog, where you can find the answers to the questions with pictures, you will be able to learn about Amigurumi in all details.
I share in this blog are amigurumi cats, amigurumi dogs, amigurumi fish, amigurumi unicorn, amigurumi penguins, amigurumi parrot, amigurumi giraffe, amigurumi pigs, amigurumi bunnies, amigurumi cows, amigurumi sheeps, amigurumi bees, amigurumi dolls, amigurumi snakes, amigurumi mice, amigurumi elephants, amigurumi pumpkins, amigurumi pandas, amigurumi owls, amigurumi cartoon characters, amigurumi twetters, amigurumi caterpillars and more …
Also I’m sharing new amigurumi free patterns every day.
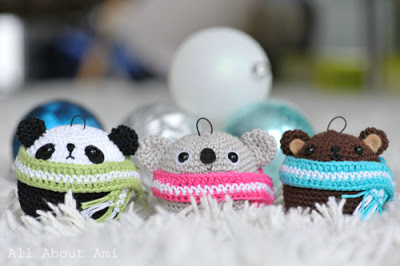
Todays daily new amigurumi free crochet pattern is Panda.
I want to give you some informations about this pattern;
Panda Yasha is the hero of the animated series for the smallest “Dragon Tosha”. Evgenia Kraeva shared her description of knitting an amigurumi panda. The toy is crocheted with YarnArt Jeans yarn.
Instagram: @shegera13
Materials:
Yarn: YarnArt Jeans, hook: No. 2.25 and 1.6
Scissors and sewing needle
Filler
Legend:
KA – amigurumi ring
c.p. – air loop
sc – single crochet
prib – increase
ub – decrease
Pens
Knit with a dark blue thread:
Right hand
1. 6 sc in KA
2. (1 sc, inc) * 3 = 9 sc
3. (2 sc, inc) * 3 = 12 sc
4. 12 sc
5. 5 sbn, 1 lush column, 6 sbn = 12 sbn
6. (2 sc, dec) * 3 = 9 sc
7.-12. 9 sc
13. 3 sc, dec, 4 sc = 8 sc
14. 8 sc
15. 2 sc for offset, 8 sc
Fill not tightly, fold the part in half and knit 3 sc for both edges.
Left hand
1. 6 sc in KA
2. (1 sc, inc) * 3 = 9 sc
3. (2 sc, inc) * 3 = 12 sc
4. 12 sc
5. 5 sbn, 1 lush column, 6 sbn = 12 sbn
6. (2 sc, dec) * 3 = 9 sc
7.-12. 9 sc
13. 7 sc, dec = 8 sc
14. 7 sbn (do not tie one sbn for displacement).
Fill loosely, fold in half and knit 3 sc for both edges of the part.
Legs, body and head are knitted in one piece, handles are knitted.
Legs (2 parts)
We start knitting with a dark blue thread:
1. 6 sc in KA
2. 6 inc \u003d 12 sb
3. (3 sc, inc) * 3 = 15 sc
4.-7. 15 sc
Change the thread to blue:
8.-9. 15 sc
We cut the thread from the first leg, and continue knitting with the thread from the second leg.
Body
We connect the first and second legs 4 ch
10. We knit on the first leg 15 sbn, 4 sbn in a chain of ch, 15 sbn in the second leg, 4 sbn in a chain of ch = 38 sbn
11. 10 sc, inc, 4 sc, inc, 2 sc, inc, 4 sc, inc, 14 sc = 42 sc
12.-16. 42 sc
17. (5 sc, dec) * 6 = 36 sc
18.-20. 36 sc
Change the thread to dark blue:
21. (4sc, dec,) * 6 = 30 sc
22. 30 sc
23. (3 sc, dec) * 6 = 24 sc
24. 24 sb. In this row we knit handles.
5 sbn, attach the left hand and knit 3 sbn with it, 9 sbn, attach the right hand and knit 3 sbn with it, 4 sbn
25. (2 sc, dec) * 6 = 18 sc
We stuff the body and legs.
Head
We knit 2 sbn to shift the marker so that it is in the middle.
Change the thread to white:
26. (2 sc, inc) * 6 = 24 sc
28. (3 sc, inc) * 6 = 30 sc
30. (4 sc, inc) * 6 = 36 sc
32. (5 sc, inc) * 6 = 42 sc
33. 6 sc, inc, (2sc, inc) * 2, 13 sc, inc, (2sc, inc) * 2, 9 sc = 48 sc
34. 48 sc
36. (7 sc, inc) * 6 = 54 sc
37. 54 sc
38. (8 sc, dec) * 6 = 54 sc
39. 54 sc
41. (7 sc, dec) * 6 = 48 sc
42. 48 sc
44. (6 sc, dec) * 6 = 42 sc
45. 42 sc
47. (5 sc, dec) * 6 = 36 sc
49. (4 sc, dec) * 6 = 30 sc
51. (3 sc, dec) * 6 = 24 sc
We stuff the neck tightly. When stuffing the head, we form an oval.
47. (2 sc, dec) * 6 = 18 sc
49. (1 sc, dec) * 6 = 12 sc
50.6 dec
Before stuffing and pulling off the hole, cut the thread.
Ears (2 parts)
We knit with a dark blue thread:
1. 6 sc in KA
2. 6 inc \u003d 12 sb
3. (1 sc, inc) * 6 = 18 sc
4. 18 sc
5. (1 sc, dec) * 6 = 12 sc
Fold in half and knit 6 sc
Tail
We knit with a dark blue thread:
1. 6 sc in KA
2. (1 sc, inc) * 3 = 9 sc
3. 9 sc
Overlays (2 parts)
We knit with a dark blue thread:
1. We collect a chain of 6 ch.
We knit on both sides of the chain, forming an oval:
In the second loop from the hook we knit 4 sc, in the last ch we knit 3 sc. On the other side 3 sbn, in the last we knit 2 sbn = 12 sbn.
2. (Prib, 1 sb) * 6 = 18 sb
3. (Prib, 2 sb) * 6 = 24 sb
4. (Prib, 3 sb) * 3 = 27 sb
We do not knit a row, fasten the thread, leave the end for sewing
Eyes (2 parts)
We start knitting with black thread:
1. 5 sc in KA
2. 5 inc \u003d 10 sb
Change the thread to turquoise:
3. (1 sc, inc) * 5 = 15 sc
Change the thread to white:
4. (2 sc, inc) * 5 = 20 sc
We embroider highlights.
Assembling the toy:
Sew the ears to the head, the tail is behind.
Sew the eyes to the overlays by sliding them to the lower right corner.
Sew patches to the head. Embroider a nose and a smile.
To make the straps of the jumpsuit: attach the thread from the back right to the 20th row, dial 11 ch, fasten the chain from the ch to the front right on the 20th row. Similarly with the second strap, only on the left.
Your Yasha is ready! When publishing a toy, please indicate the name of the author.

More Amigurumi Panda Ideas:

Amigurumi Panda
By Iris

Panda Bear
by angiesartstudio

Amigurumi Panda
by whistleandivy

Pudgy Panda Plushie
by Spin A Yarn

Easy Little Crochet Panda Amigurumi
by lovelycraft